Backing up printer configuration files to GitHub
Having working backups is a good idea for just about everything, and for our printers, even more so! Configuration files are often changed when tuning or experimentation, but how can you keep track of those changes and be able to find previous values? In some cases, adding the old value as a comment can be useful, but long term, this becomes tedious.
Additionally, sometimes SD cards just fail, or some other unforeseen circumstances arise that prevent things from working or accessing configuration files on your printer.
Let’s solve both of these problems by setting up a simple backup/change tracking methodology to GitHub!
Before we begin
This tutorial will expose you to a lot of common aspects of owning a Voron, including managing configuration files, editing files from Linux, and more. If you have never done this before, do not panic! Its easy! Just follow along with the commands which you can copy to your clipboard. Screenshots are also included to give you an idea of what to expect your side to look like, etc.
Experience is just a series of past mistakes we try to not make anymore. Remember, everyone started out at some point right where you find yourself now. You will improve with practice!
Sign into GitHub and create a new repository
NOTE: If you do not have a GitHub account, create one by clicking here and filling out all the details (Hold down the CTRL key to open that URL in a new tab, vs changing to it in this one)
- Sign into your GitHub account
-
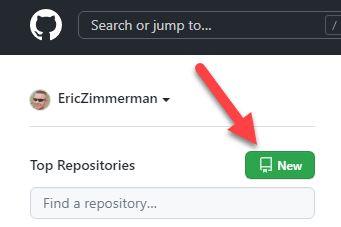
Create a new repository by clicking on the New button
-
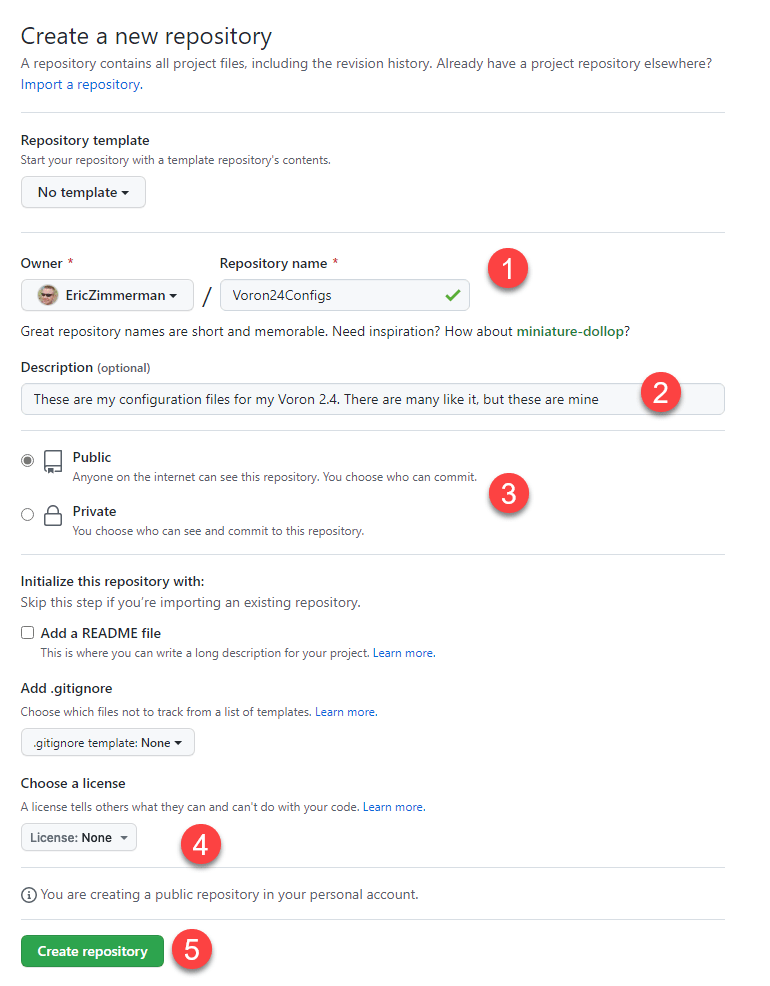
Update details for the new repository
- If you plan on having more than one printer some day, use a repository name that is specific to that printer
- Description is optional, but nice to have, especially for other people that may reference your config
- Public or Private is up to you.
- Select the following options under “Initialize this repository with”:
- Make sure “Add a README file” is unchecked.
- Select “None” for .gitignore template.
- Select “None” for the license.
The license is optional, but after your backup is working you should add one. I usually do MIT for all my stuff, but your mileage may vary.
-
You now have a new git repository! The next thing to do is make a note of the URL to this repository. Click the green
Codebutton, then copy theHTTPSurl to the clipboard via the button to the right of the URL.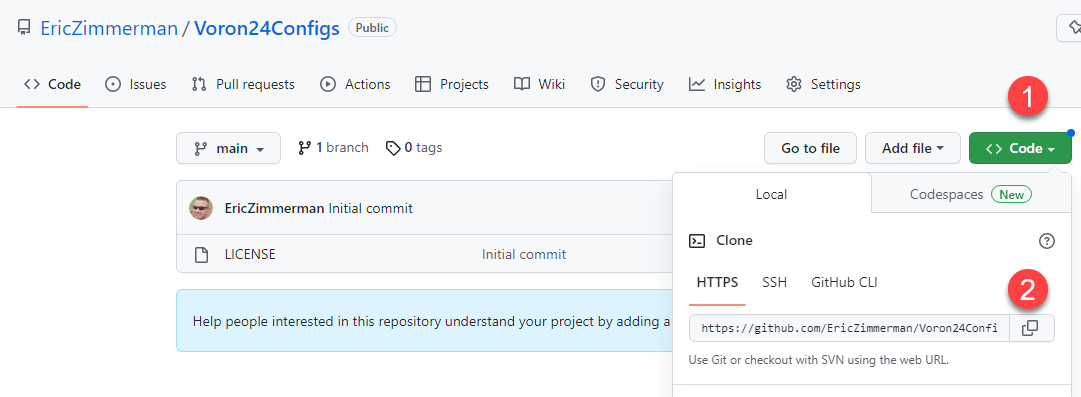
-
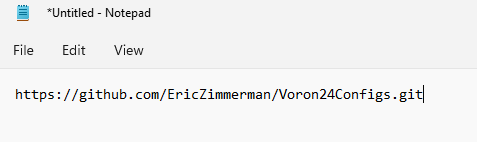
Open up your favorite text editor and paste this URL into it for later use
Generate an access token
Next up, we need to generate a token that can be used to authenticate against our newly created repository.
-
Click here to access your
Personal Access Tokenssettings. You will, of course, need to be signed in to get to this. -
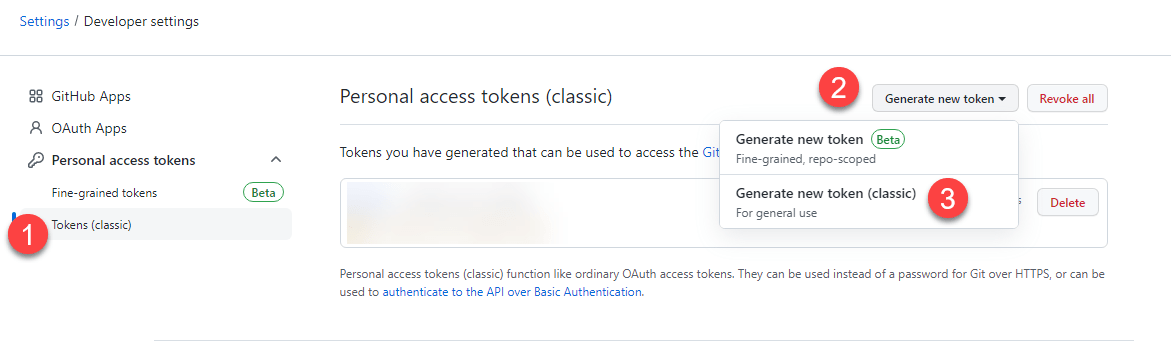
Ensure
Tokens (classic)is selected on the leftmost side, then create a new token via theGenerate new tokenmenu. Be sure to select theclassic optionNOTE: If you are prompted to reauthenticate, do so. This is a safety measure as you are about to create a sensitive credential
-
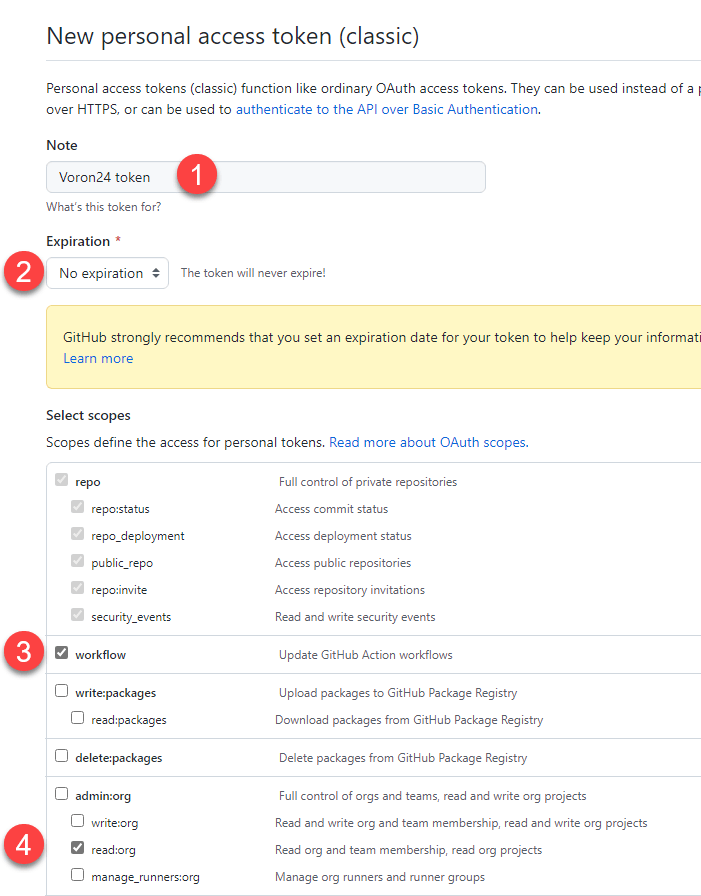
Give your token a meaningful name, set the Expiration date to
No expiration, and check theworkflowandread:orgunderadmin:orgsectionWARNING: If you prefer to set an expiration date for your token, feel free to do so, but be aware you will have to regenerate a new token as things expire, as well as update some other settings that we have not got to yet
-
Scroll to the bottom of the page, and click
Generate token
-
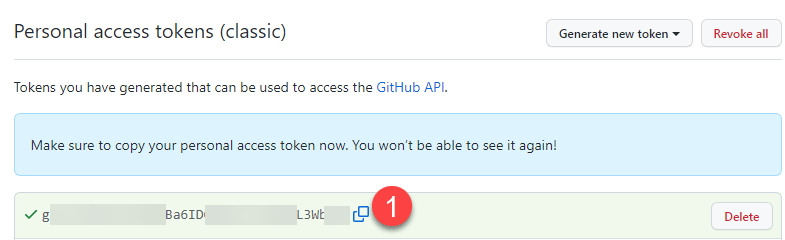
You now have a new access key! Protect it well, like you would any other password! Click on the
Copybutton to copy the token to the clipboard, then paste it into the same place you saved your HTTPS URL from the previous step.This is your ONE AND ONLY chance to copy this key, so make sure you record it before leaving this screen.
NOTE: The image below has the key redacted. Yours will of course not look like that
Combine our HTTPS URL with our token
We can now put the pieces together we have created so far. To make this easier, I will be working with these pieces, but you should of course use the values you generated above.
- URL: https://github.com/EricZimmerman/Voron24Configs.git
- Token: ghp_dKXXXXXXXXXXXXXXXXXXXXXXXXXXXXXXXXXX
-
Insert the token into the URL following this pattern:
https://<Token>@github.com/EricZimmerman/Voron24Configs.gitwhich for my values, would end up looking like:
https://ghp_dKXXXXXXXXXXXXXXXXXXXXXXXXXXXXXXXXXX@github.com/EricZimmerman/Voron24Configs.gitNote that you do not want the <> symbols, as that’s just a placeholder so you can see the pattern easier.
-
Copy this newly crafted URL to your text editor. This is the URL we will be using in a later step.
WARNING: NEVER EVER put the token you generated in any of the files that will be committed to GitHub! If you do so, GitHub will see it and (rightly) revoke your token!
Connect to your printer via SSH
-
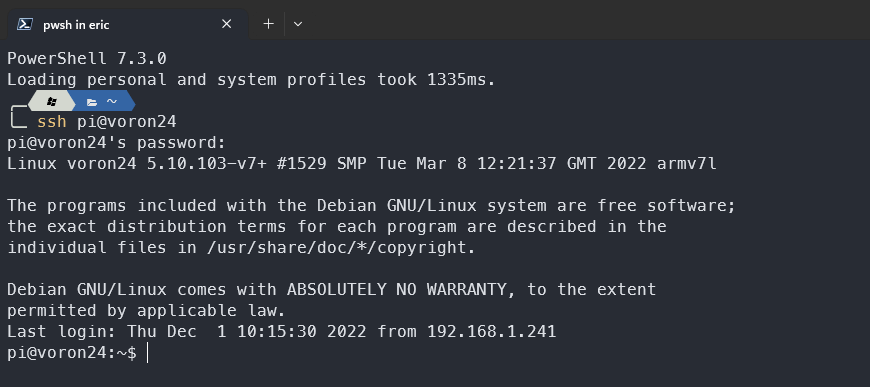
Open up a PowerShell window, or use whatever program you usually use (many people use putty, but ssh is built right into Windows) to connect to your printer via SSH, and connect to your printer
-
Change directories into your
configdirectory, which is where all of your configuration files livecd ~/printer_data/config -
Download the
autocommit.shfile using the command below:wget -O ~/printer_data/config/autocommit.sh https://raw.githubusercontent.com/EricZimmerman/VoronTools/main/autocommit.sh -
Edit the file for your particular use case using the command below. For example, if you use fluidd, uncomment the
fluidd_folderline, comment outmainsail_folderand so on.nano ~/printer_data/config/autocommit.sh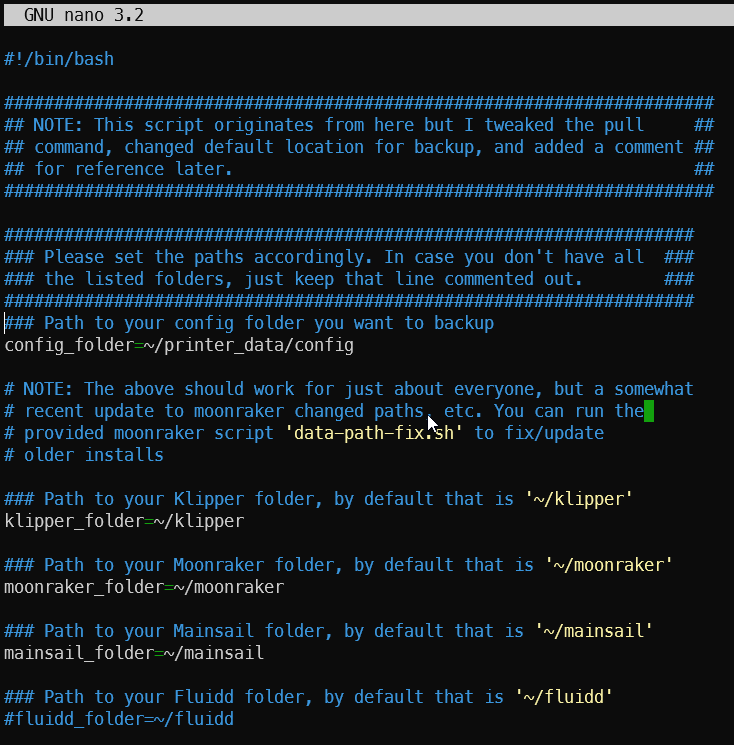
-
Save the file. If using nano, press
Ctrl-o(o, not zero), verify the name of the file in the bottom left, and pressEnter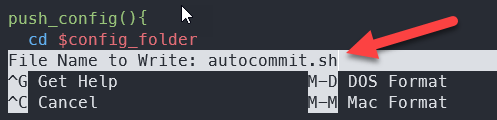
-
Exit your editor. In nano, press
Ctrl-x. You should now be back in your shell.
-
Next, we need to change the permissions on the file so that it can be executed easily. Type the following command, followed by
Enterchmod +x autocommit.shThis command will add execute permission for the owner of the file (you), group members, and all other users on the system. This makes it easy to run the script by different users, etc.
:boom: If you edit this file from MainSail, the execute permission will be removed, and you will have to repeat the above command!
-
Type
ls -la autocommit.shand verify the new permissions. Note thexfor user, group, and other. This is the execute permission we added in the previous step.
-
The script will also copy your print statistics and history each time the backup is made. This data is kept in a sqlite database
Initialize git
-
Right now our config files are not being tracked by git. Run the following command to initialize git, using the branch main:
git init -b mainwhich results in something like this:

-
Recall earlier that we generated an access token and crafted a special URL to our repository. Now we need to tell git to use this URL. Using the URL we generated in the last step of our GitHub work, run the following command:
NOTE: Be sure to use YOUR URL and not type what you see below or you will be disappointed with the results =)
git remote add origin https://ghp_dKXXXXXXXXXXXXXXXXXXXXXXXXXXXXXXXXXX@github.com/EricZimmerman/Voron24Configs.git/ -
Verify things by running
git remote -vwhich should look similar to this (your URLs will be different)
-
If this is your first time setting up git on your printer you may need to set your user and email details for git to use later. if you don’t do it now it will prompt you later ;)
git config --global user.email "your@email.com" git config --global user.name "your name" -
Finally, lets create a
.gitignorefile that lets us tell git to NOT commit certain things, like input shaper csv files, etc. Using nano, create a new file in~/printer_data/confignamed.gitignore(using the commandnano .gitignore) and add entries to the file, specifying the file patterns and/or locations to ignore.saved_variables.cfg adxl_results/belts/*.csv adxl_results/vibrations/*.tar.gzIn this example, I am excluding *.csv from input shaper and other data collection related files and my Nevermore filter’s runtime file. These are just things I do not want in my backup.
Note how these directories are relative to the root of your git repository, which in our case, is
~/printer_data/config, so just specify the paths from that point forward.This is a more or less optional step, but it is handy for preventing large or unwanted files from being committed.
-
When done, save the file and exit nano
-
At this point we are ready to commit (at least manually)! Run the following command (NOTE: Any errors about
masternot existing the first time you run the script can be safely ignored):sh autocommit.shwhich should result in a lot of activity, ending with something like this:
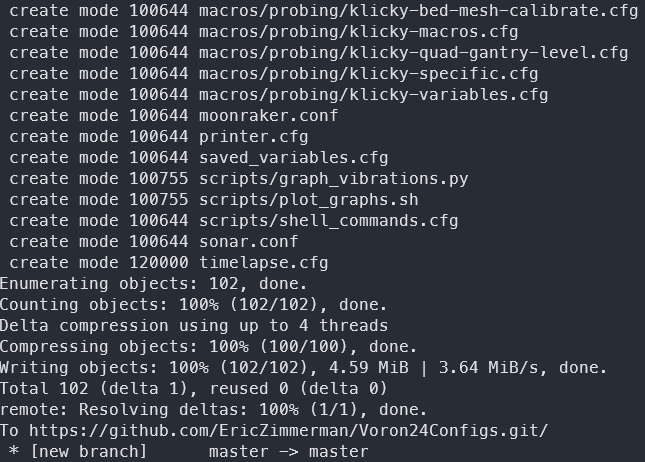
If you see something similar to what is shown in the image above, congratulations! You are now backed up to GitHub! Rerunning the previous command
sh autocommit.shshould result in the following: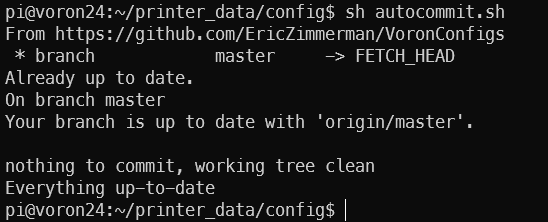
NOTE: In the screenshots, the master branch is shown, but yours is most likely the main branch, as that is what GitHub uses as its default these days. Do not worry about this.
However, if you change any file in Mainsail, via nano, etc. and then rerun the
sh autocommit.shcommand, you will see it found your changes and sent them upstream! Here is an example after I editedprinter.cfg: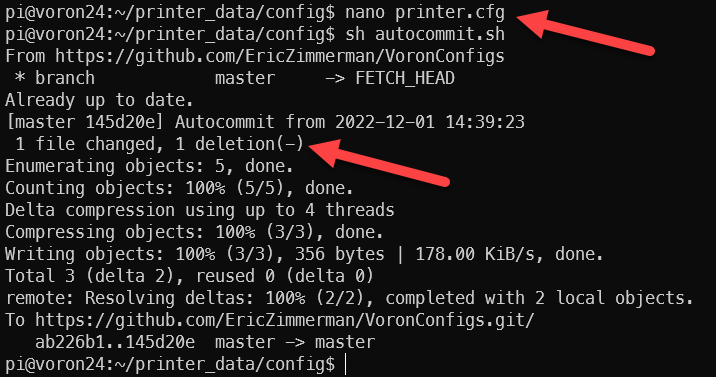
If you go to your GitHub repository, you can also see these changes by clicking on the commits, which is on the right side (NOTE: Make sure you are looking at the branch
mainin GitHub. This can be changed via the dropdown on the left side if needed):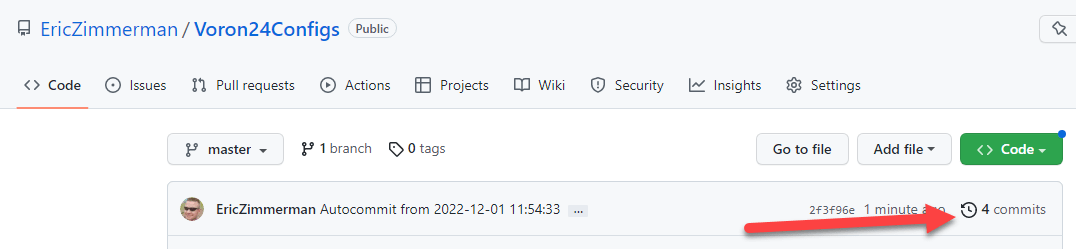
You are now looking at all the commits to your repository. Clicking the top one shows all the files and their changes!

Here you can see what actually changed. In my simple example, I just removed a blank line from the end of my
printer.cfgfile. Also of note is the exact versions of other software being used with these configs, which is shown in the commit message.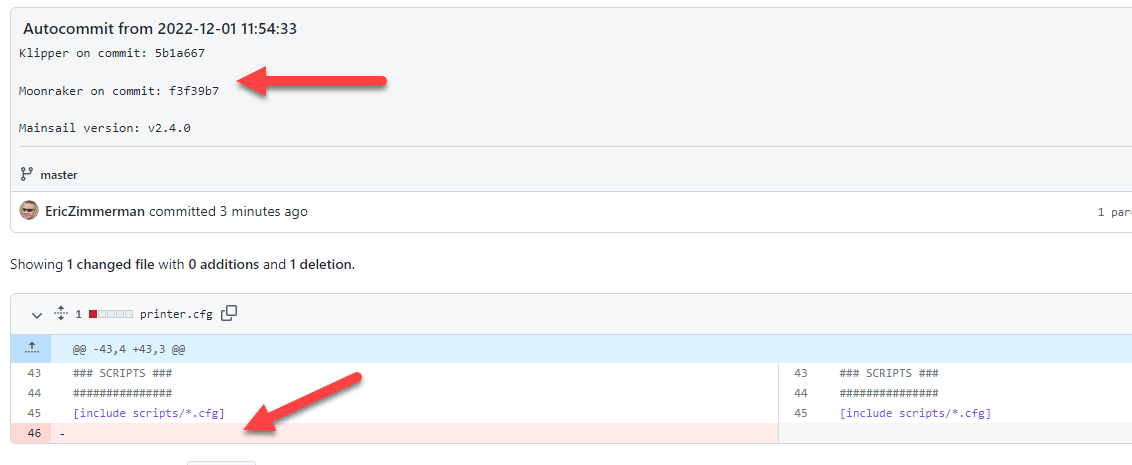
One thing to be aware of is that, from a commit message perspective, about the only thing that will be changing for each commit is the timestamp associated with the commit. However, git will know about all the exact changes for everything being committed. If you recall a specific timeframe where you made a configuration change, it is rather straightforward to find the previous commit to see older values, but, since git is keeping track of all changes over time, you can easily look at a single file and then drill down into that file’s commit history.
For example, say I wanted to see, over time, all of the changes to my Auto Z related config file. After clicking on the file to view it, notice the History button in the upper right corner.
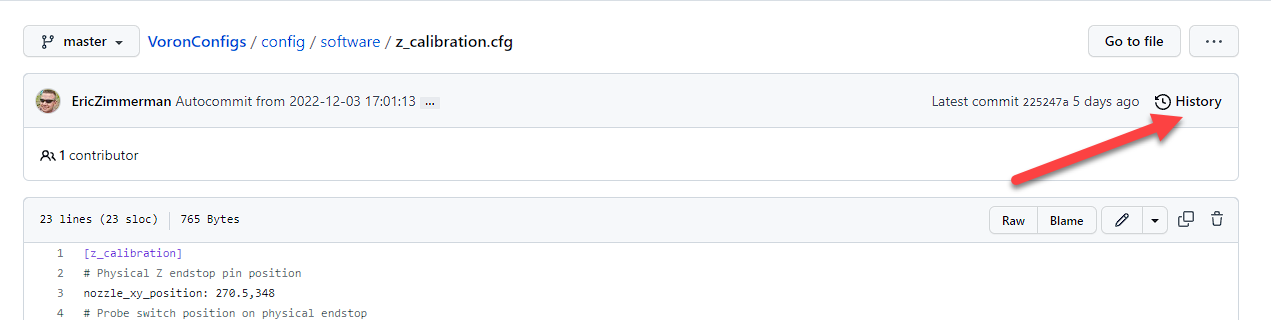
Once you click the History button, you can then see all of the revisions that contain changes to that particular file. This is another great way to see the exact dates changes were made for a given file, as shown below.

Note that while the history list contains every change to the file that is being viewed, it also contains all other revisions to other files that were committed on the same date/time.
Using this approach makes it easier to track down a specific change configuration details.
Adding the backup to a macro
Now that things are working at the shell, lets create a macro that lets us back up on demand in Mainsail or Fluidd.
-
In your terminal window, use nano to create a new file in the location of your choosing under
~/printer_data/confignamedconfig_backup.cfg -
Paste the following content into the editor:
 [gcode_shell_command backup_cfg]
 command: ~/printer_data/config/autocommit.sh
 timeout: 30
 verbose: True

 [gcode_macro BACKUP_CFG]
 description: Backs up config directory GitHub
 gcode:
     RUN_SHELL_COMMAND CMD=backup_cfg
The first section is used for running our autocommit.sh file we created earlier, and the second is the macro that will show up in your interface. If you use a different user other than
pi, update the path accordingly. -
Save the file via
Ctrl-oand exit viaCtrl-x -
Edit
printer.cfgand add an[include config_backup.cfg], then save and exit. Adjust your path as necessary to wherever you created your cfg file. -
Finally, execute the following to download the latest version of the
gcode_shell_commandscriptwget -O ~/klipper/klippy/extras/gcode_shell_command.py https://raw.githubusercontent.com/dw-0/kiauh/refs/heads/master/kiauh/extensions/gcode_shell_cmd/assets/gcode_shell_command.pyYou can optionally use
kiauh, via option4, then option8to accomplish this. For more info on kiauh, go here
Running things from Mainsail
-
Connect to your printer, then look in the Macros section for our newly minted macro, named
BACKUP CFG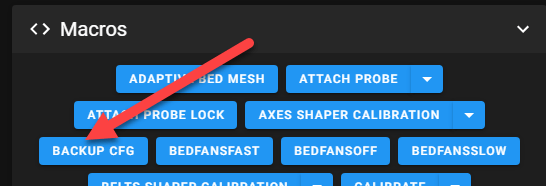
-
Click on the
BACKUP CFGbutton and the console will report the output from the command: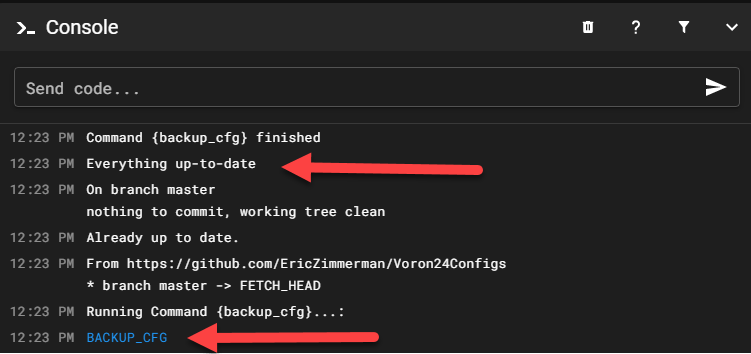
-
You can click this button manually any time you want to create a backup
Editing files on GitHub and updating your printer
In some cases, it is useful to edit files on GitHub and then have those changes show up on your printer. Because we have set things up to both pull FROM GitHub and push TO GitHub, this is now possible.
Be warned though that if you edit files on your printer and do not back them up, then edit the same files on GitHub, and THEN do a backup, you may run into issues where git cannot automatically merge these changes together.
Do not worry too much about this though, because git is usually very good at merges, but if you get stuck, feel free to ask in Discord!
Enjoy your new backups and never worry again about your config files being unavailable!
Automating via crontab (OPTIONAL)
If you want to maintain a backup via cron, visit this site and select the appropriate options.
Script to execute: /usr/bin/bash /home/pi/printer_data/config/autocommit.sh
This results in a crontab entry similar to:
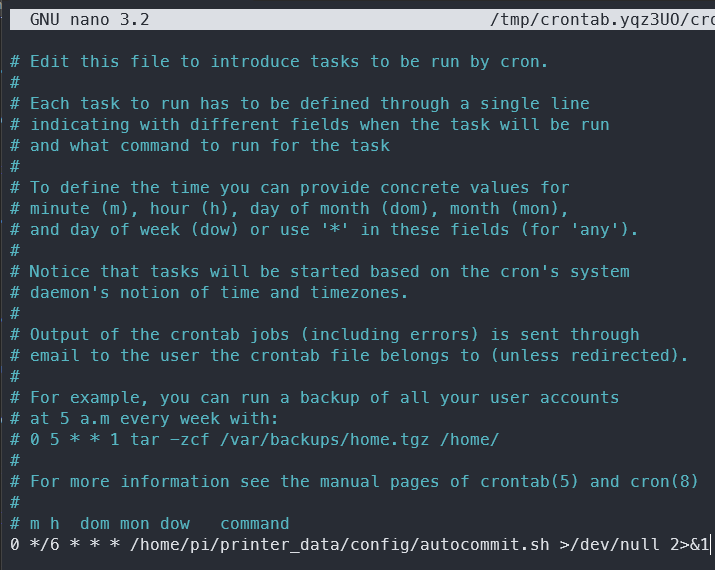
0 */6 * * * /usr/bin/bash /home/pi/printer_data/config/autocommit.sh >/dev/null 2>&1
which can then be added to your crontab file via the crontab -e command by pasting it in at the bottom:
Restoring from your backup
This is written assuming a fresh install but steps can be omitted if previously completed on the current install.
WARNING: Only files which have been backed up can be restored, if during setup you created exclusions then those files/directories will be omitted
The Restore Process
-
Open an SSH terminal to your printer
-
Configure your global credentials
 git config --global user.email "your@email.com"
 git config --global user.name "your name"
-
Generate yourself a new Github Access Token but stop where it says to connect to SSH (we already did that ;)
-
Run the following commands to restore the files from your latest GitHub commit back to your printer:
 cd ~/printer_data/config
 git init -b main
 git remote add origin https://<new github access token>@github.com/<yourname>/<yourbackuprepo>.git
 git fetch
 git reset origin/main
 git reset --hard HEAD
for example
 cd ~/printer_data/config
 git init -b main
 git remote add origin https://<token>@github.com/EricZimmerman/Voron02.git
 git fetch
 git reset origin/main
 git reset --hard HEAD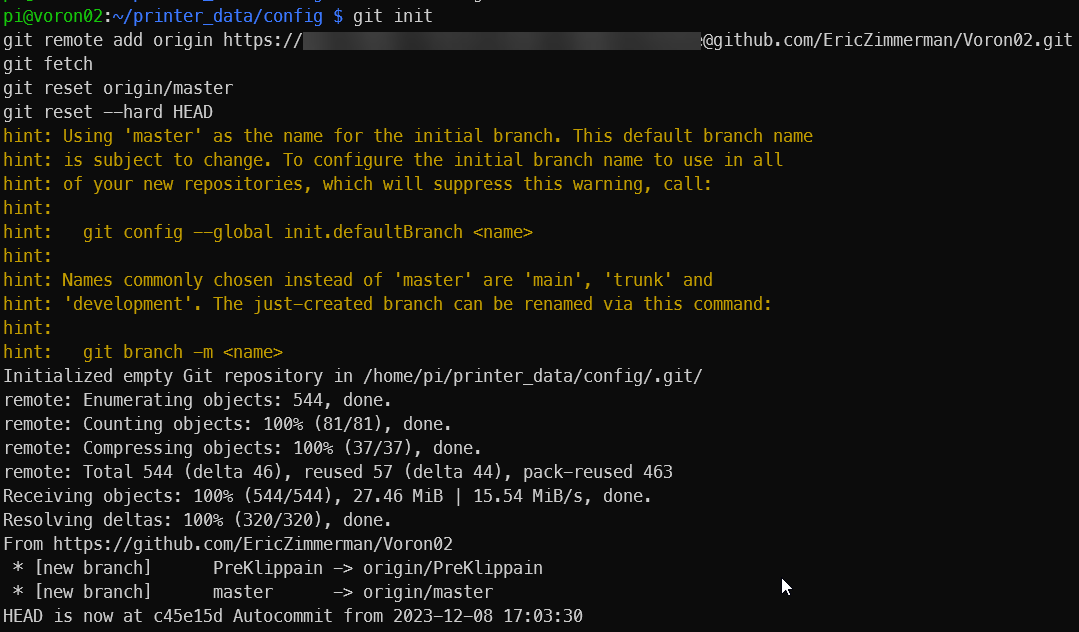
Post restore clean up
At this point your automated backups are not enabled on the new install so we need to do a little cleanup.
-
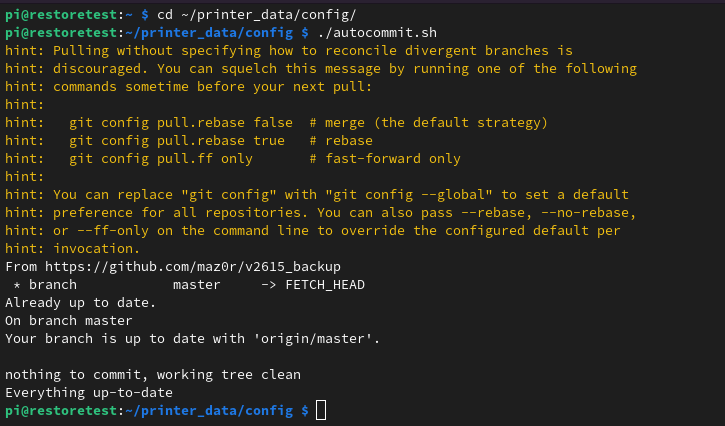
Verify that your ~/printer_data/config/autocommit.sh works
cd ~/printer_data/config/
./autocommit.sh
It should look something like this (as nothing has changed yet!)
- Add “gcode_shell_command.py per step 5 under Adding the backup to a macro.
- (optional) Add a cron job to backup on a set interval per Automatic backups via crontab
- Test the backup macro from mainsail