Voron V1.8/Trident - BTT Octopus (Pro) Wiring
Do not leave HE0 or HE1 connected.
There have been reports of Octopus boards coming preloaded with a firmware that turns on all heaters and fans as soon as you power up the board. As a result, we recommend leaving the heaters disconnected until after loading the klipper firmware
Initial Preparation
Set jumpers as shown:
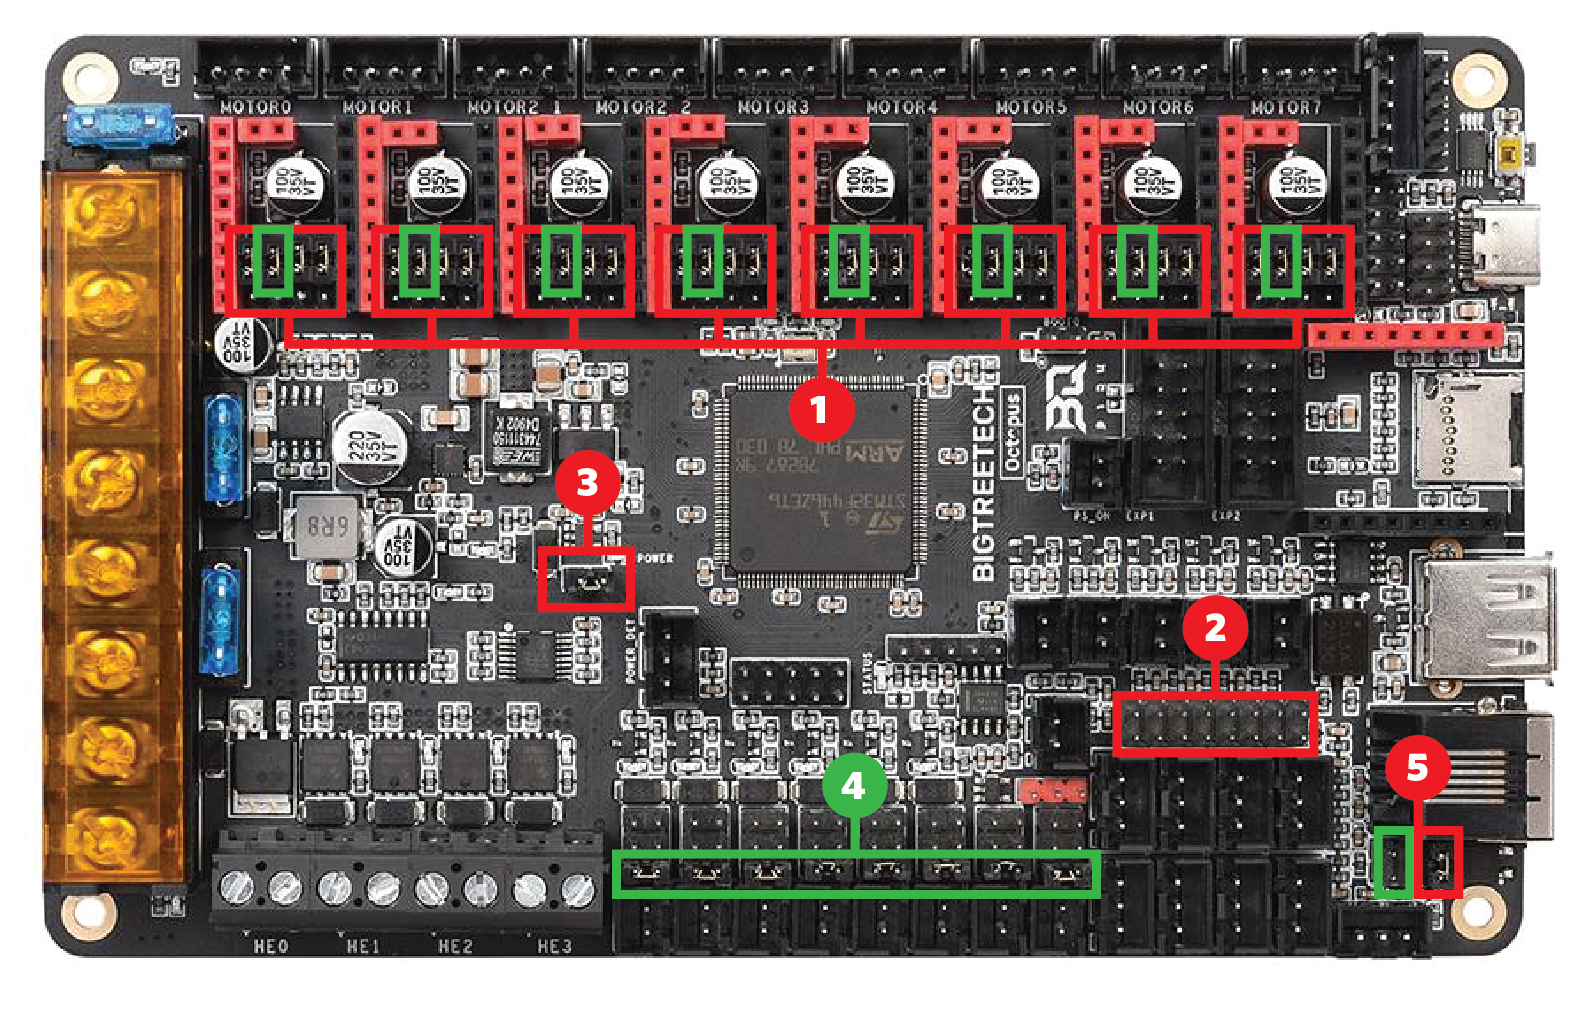
Green – Add Jumper
Red – Remove Jumper
- Insert only the jumper in the Green and remove the other three jumpers in the Red in order to use TMC2209 UART mode.
- Remove all the jumpers of DIAG to avoid the influence of TMC2209 DIAG on the endstop.
- Remove the USB 5V power supply jumper to avoid the interaction between the USB 5V of raspberry pi and the DC-DC 5V of the motherboard.
- Insert all the jumpers into V_FUSED to set the fan voltage to the system supply voltage.
- Insert the jumper into V_FUSED to set the probe voltage to the system supply voltage.
Wiring
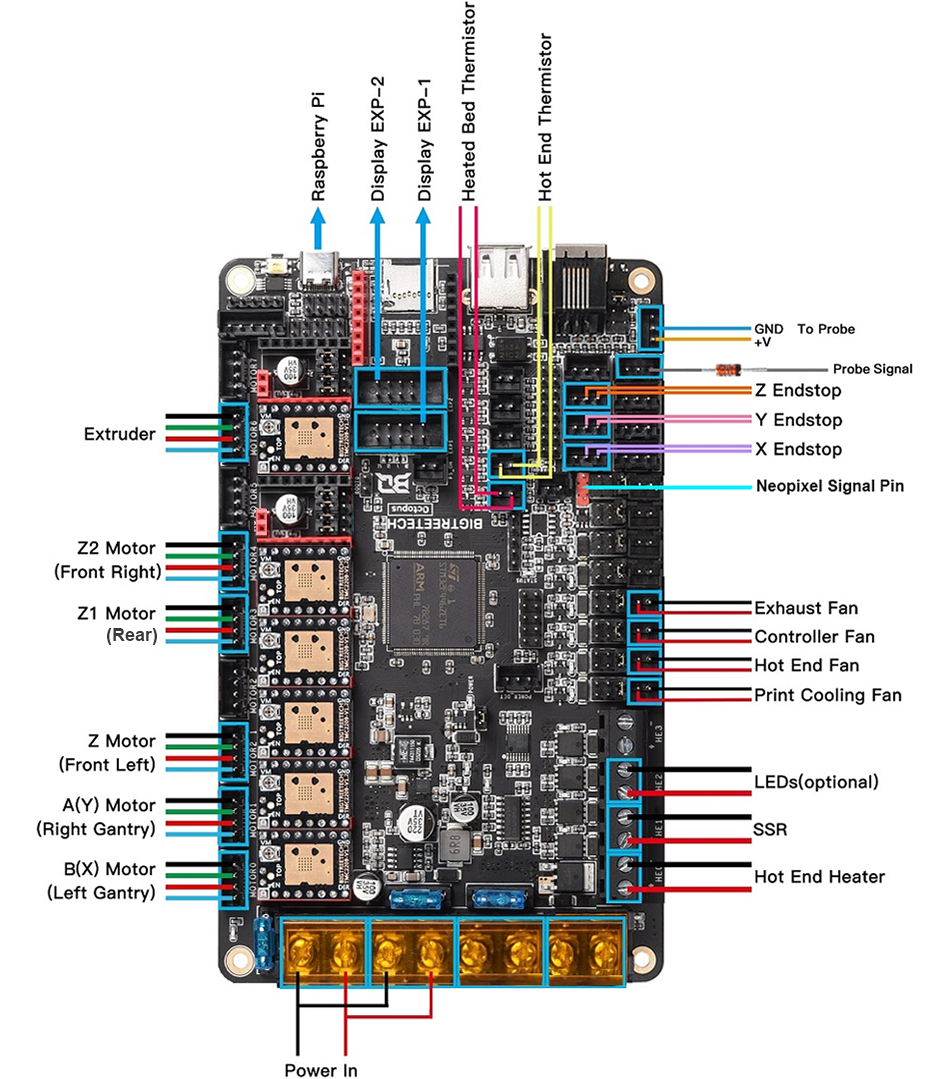
- Connect 24V and GND (V+ and V-) from the PSU to PWR and MOTOR_POWER
- Connect the B Motor (gantry left) to MOTOR0
- Connect the A Motor (gantry right) to MOTOR1
- Connect the Z (Front Left) motor to MOTOR2_1
- Connect the Z1 (Rear) motor to MOTOR3
- Connect the Z2 (Front Right) motor to MOTOR4
- Connect the extruder motor to MOTOR6
- Connect the hot end heater to HE0 ( do not leave connected )
- Connect the bed SSR (DC Control Side) to HE1 ( do not leave connected )
- Connect the part cooling fan to FAN0
- Connect the hot end fan to FAN1
- Connect the controller fans to FAN2
- Connect the chamber exhaust fan to FAN3
- Connect the hot end thermistor to TE0
- Connect the bed thermistor to TB
- Connect the X endstop to STOP_0
- Connect the Y endstop to STOP_1
- Connect the Z endstop to STOP_2
- Connect the signal wire on the probe to STOP_7
- Connect the V+ and 0V wires on the probe to PROBE
If you’re using a mini12864 display, connect to EXP1 & EXP2, only after completing the steps outlined in the mini12864 guide
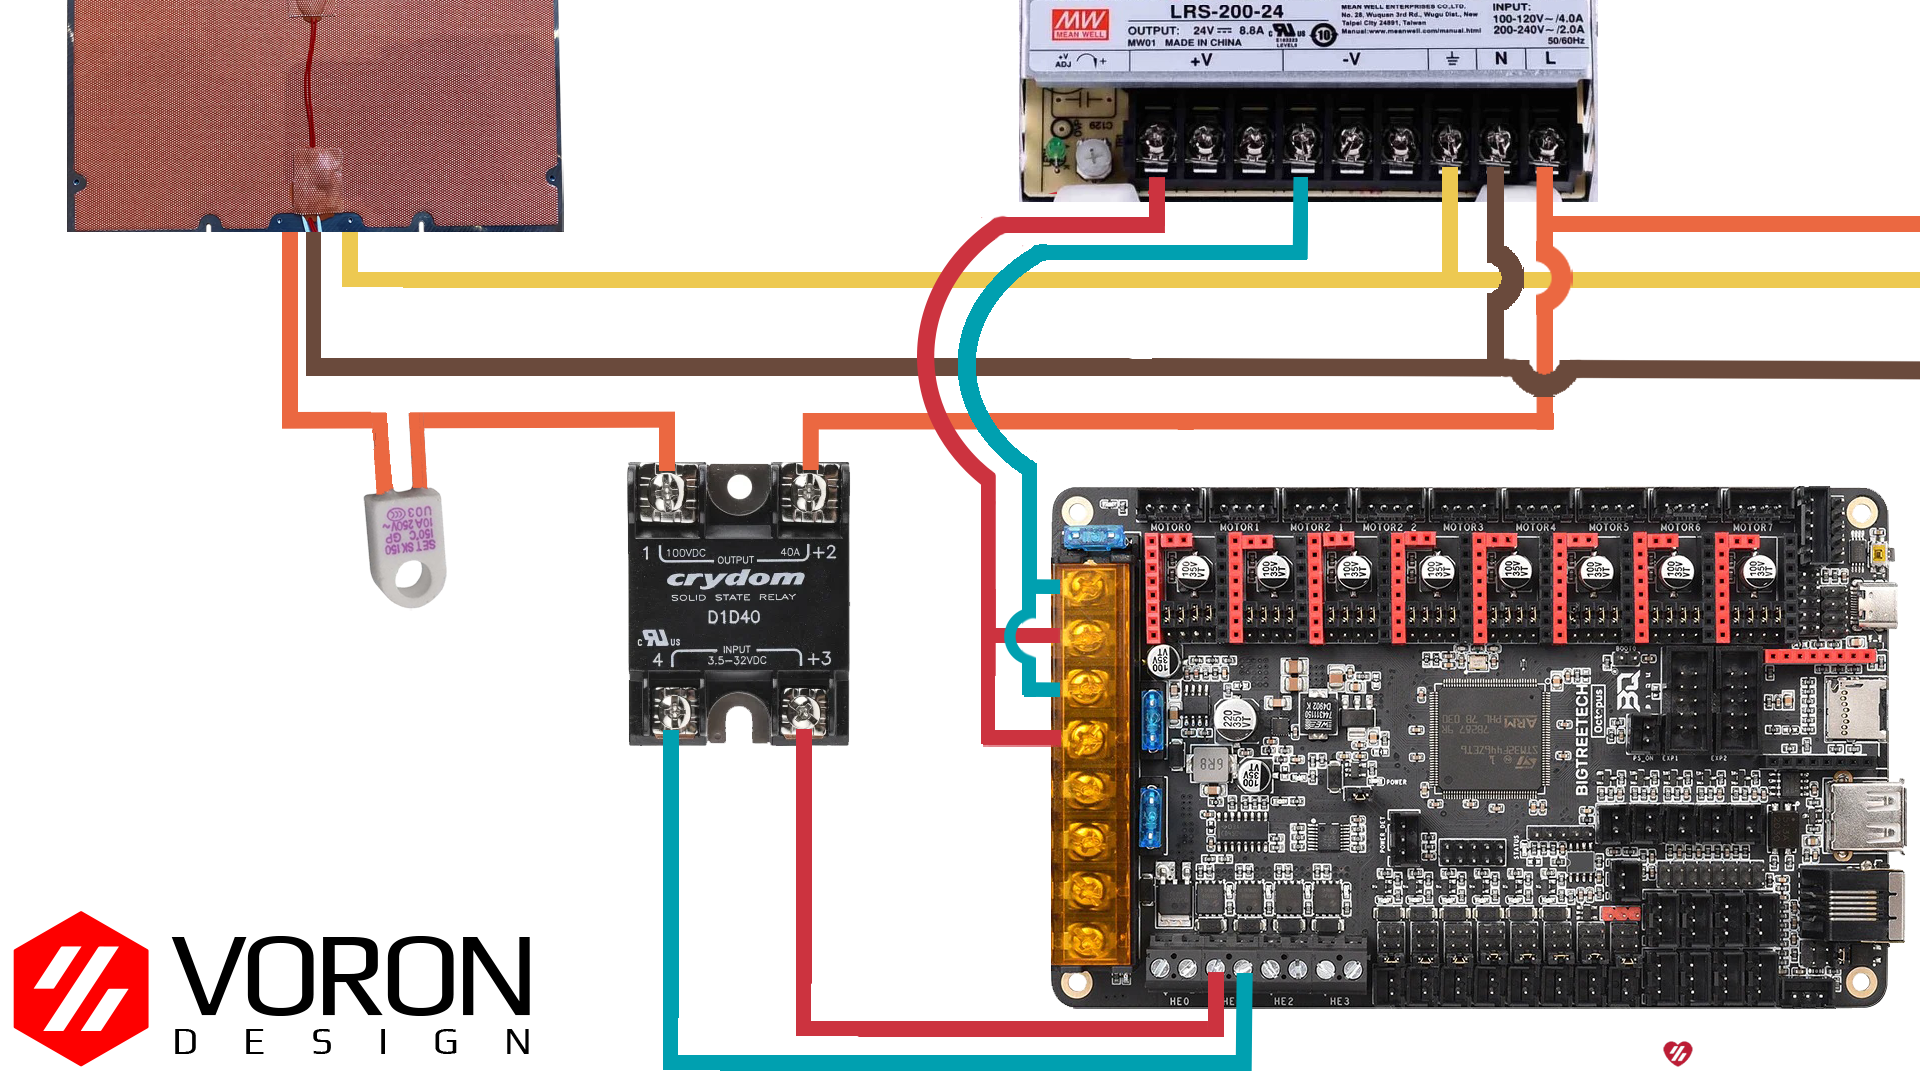
SSR Wiring
Wire colors will vary depending on your location.
mini 12864 display
Other
- Full pinout and other BigTreeTech documentation can be found on the BTT Octopus V1 GitHub
- Octopus v1.1 pinout is located here
- Octopus Pro v1.0 pinout is located here